Labels
BASS
(50)
COMPRESSION
(32)
DRUMS
(45)
EFFECTS
(49)
EQUALIZATION
(30)
GUITAR
(112)
HOME RECORDING
(95)
IMPULSES
(21)
INTERVIEWS
(19)
KARAOKE
(1)
LIVE
(10)
MASTERING
(61)
MIDI
(21)
MIXING
(179)
REVIEWS
(156)
SAMPLES
(69)
SONGWRITING
(19)
SYNTH
(3)
VOCALS
(31)
Saturday, March 28, 2015
Review and Tutorial: Rancorsoft Super Angry Distortion
Hello and welcome to this week's article!
Today we're going to review a saturation plugin produced by Rancorsoft and called "Super Angry Distortion".
This plugin is obviously made to add to a sound (for example a drum or a vocal track) some grit, to add some sparkle if the track is a bit dull, or to obtain creative results, with a downsample that can be really extreme and that can let us get sounds chiptune-like, or made with a vintage computer soundcard.
What is interesting is that this plugin, instead of just boasting "digital tube modeling" etc, it just gives us four different types of distortion, and lets us mix and match them until we find the equilibrium we need.
The knobs are:
Coarse Downsample this is a very gritty distortion, that lets us reach very fast a "chiptune" effect
Fine Downsample this one is a more subtle one, which preserves the original sound more
Even Harmonics this is a harmonic exciter that boosts the even harmonics, the ones generated from a tube amplifier
Odd Harmonics this harmonic exciter, instead, boosts the odd harmonics, the ones created from an analog, non tube, amplifier.
Wet/Dry and Volume obviously doesn't need an explaination.
This plugin differs from the other distortion or saturation processors on the market for its flexiblity: while others are often made to add a subtle saturation, this vst lets us range from that same saturation to incredible levels of distortion, incorporating capabilities typical of a bit crusher and a versatile harmonic exciter.
I would work a little bit more on the ui, which looks a bit cheap, but other than that, we really suggest you to check this plugin out.
Become fan of this blog on Facebook! Share it and contact us to collaborate!!
Saturday, March 21, 2015
Expander. What is it and how to use it? (free Vst Plugins included)
Hello everyone and welcome to this week's article!
Today we're going to talk about a topic that we have kinda overlooked in our analysis of the audio processors, because it's basically the other side of the coin of a Gate, but that actually deserves a deepening: the Expander.
An expander comes usually in the same plugin of a gate, and it is always a derivation of a compressor, that's why most of the controls will be the same: threshold, attack, release, knee and so on.
With the same controls, we can obtain different results:
Compressor: it attenuates the signal that surpasses a certain threshold, with a strenght that we can decide (e.g. is useful to attenuate the occasional peaks of a snare drum).
Gate: it attenuates the signal below a certain threshold, leaving the part of the signal above it untouched (e.g. is useful to eliminate the electric guitar background noise)
Expander: it raises the gain of the part of the sound that surpasses a certain threshold. Basically what it does is the opposite of a compressor (e.g. we have to restore some dynamic range from an overcompressed recording, or we have to make the main element of an audio track to pop out more compared to the others).
So the function of an expander is to make a sound to pop out more and restore some dynamic range, without necessarily attenuating the background sounds.
How do we use it? It's simple: we must find the level which gets surpassed only by the element that we want to emphasize and put the threshold to that level, from there with the "expand" control we raise the gain to the desired level. Obviously we can also refine the setting deciding attack and release times.
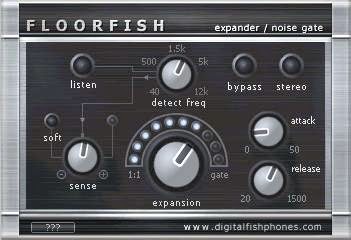
DigitalfishPhones Floorfish one of the most celebrated free gate/expanders.
ReaGate the gate/expander from the Reaper serie, very simple and versatile.
Variety of Sound Prefix this is a processor which incorporates eq, phase alignment, gate and expander.
Become fan of this blog on Facebook! Share it and contact us to collaborate!!
Saturday, March 14, 2015
Review and tutorial: Fabfilter Pro G
Hello and welcome to this week's article!
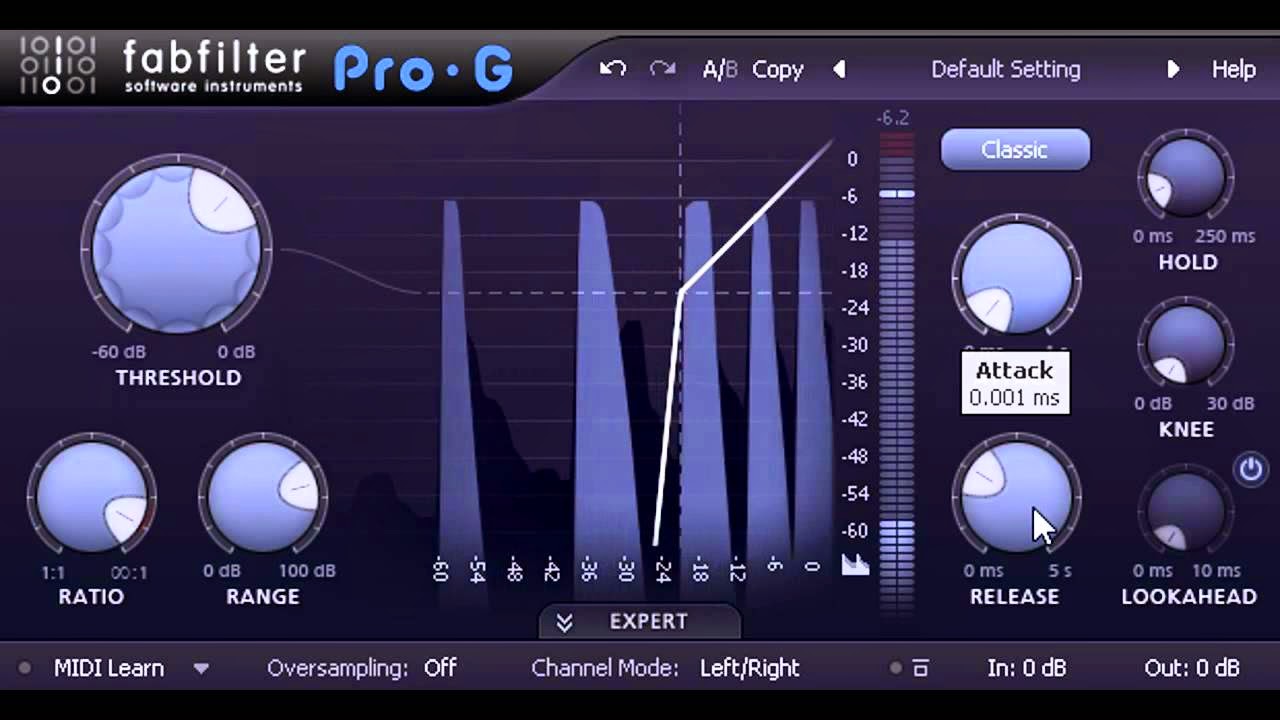
Today we continue our overlook on the Fabfilter product line, focusing on their Gate: the Fabfilter Pro G.
This plugin applies the Fabfilter typical interface (with a real time graphic peak analyzer) to a Gate/Expander module.
What is a Gate (click here for a dedicated article)? A Gate is basically a Compressor which lowers the gain not beyond a certain threshold (as a normal compressor would), but below it, and it is a tool created to eliminate background noise from distorted guitars, for example, or open air recordings, or even to remove mic bleeds from acoustic drumsets: only the sounds above the selected threshold will be heard.
Since it's basically a Compressor, most of the controls are also the same: Attack, Release, Threshold, Ratio, Knee and so on, but there is also an expert mode which lets us use advanced functions such as "sidechain mode", and Mid-Side processing.
This unit can be used as an Expander plugin too, using the "Upward" function.
This function is basically used to restore some dynamic range on some recording which has been overcompressed for example, or in every situation in which you have to raise the volume of only the peaks that surpass a certain threshold, leaving the rest unprocessed.
This is yet another fine plugin that helps us fine-tuning our sounds, thanks both to good graphic ui and to some controls which are rarely featured on others products.
- Adjustable range, hold time and knee settings
- Optional look-ahead time up to 10 ms
- Expert mode that offers highly customizable side chain options
- Mono, stereo or mid/side processing
- Up to four times linear-phase oversampling
- MIDI triggering: open the gate/expander with your MIDI keyboard
- External side chain option
- Separate dry/wet level settings
- MIDI Learn
- Undo/redo and A/B comparison
Saturday, March 7, 2015
"Horror" Preverb: what it is and how to create this effect
Hello and welcome to this week's article!
Today we're going to talk about the "Preverb" effect, a particular use of the Reverb effect that creates a typical "Horror" vibe (and that has been extensively used in many movies too, for example on "The Exorcist").
With the term "Preverb" we refer to a reversed reverb that happens before the actual sound that generates it, and this effect it's obtained in a rather clever way;
this explaination is about how to do it in the typical Cubase\Nuendo interface, but it can be done the same way with any DAW.
1) First we need to select the audio track we need to process (for example a vocal track, or a drum track), and click on Process->Reverse
2) Then we put a nice Reverb on our Track, with a long tail, and with the mix control set to 100% Wet.
3) Now we must export our reverbered track to apply the effect on the track permanently.
4) After that, we must import back the track on our project, and do Process->Reverse again, so that the sound will be straight, and only the Reverb will be reversed!
Now playing the track you will hear first the tail of the reverb, then the actual sound, and this will make a very sinister effect.
Hope this was helpful!
Become fan of this blog on Facebook! Share it and contact us to collaborate!!
Subscribe to:
Posts (Atom)


