Labels

BASS (50) COMPRESSION (32) DRUMS (45) EFFECTS (49) EQUALIZATION (30) GUITAR (112) HOME RECORDING (95) IMPULSES (21) INTERVIEWS (19) KARAOKE (1) LIVE (10) MASTERING (61) MIDI (21) MIXING (179) REVIEWS (156) SAMPLES (69) SONGWRITING (19) SYNTH (3) VOCALS (31)

Saturday, June 23, 2012

HOW TO USE DRUMAGOG AND THE OTHER DRUM REPLACERS (free Vst plugins and samples inside)


Hello and welcome to this week's article! Today we're going to talk about Drum Replacement!
Drum replacement is a very common technique nowadays, and it consists in taking the peaks of a drum track (an audio track, or even a MIDI) using a level analizer, setting a threshold like we're using a Compressor, and every peak that exceedes that threshold is considered by the program a hit to be replaced with a midi sample of our choice.
This technique can be used to replace virtually anything with any sample, but it has been developed specifically for drums, because this is the application where it really turns out to be useful: to add the sound of an already processed snare, kick or tom to the original sound we have recorded and blend them, in order to give more punch, clarity and "professional vibe" to our songs.

Those plugins usually gives you the opportunity to "refine the search" of the peaks to be replaced, supporting Equalization filters and a volume fader, in order to isolate as much as possible the range of sounds to be processed, since it's a common problem to have replaced more sounds that we need, for example a long-tailed snare hit may be interpreted as more than one single sound so the plugin may add a double or triple hit on it. It takes some practice to set up the software so that only the sounds we need are replaced.

- The first and best drum replacement program around is Drumagog, it comes with some sample bundled sample and lets you use Wave files and the proprietary .GOG standard, which supports multisampling in order to assign the right sample according to the Velocity of every hit.
Another very interesting and useful feature is the "Blend" control, that lets you choose the percentage of original and triggered sound you want, mixing them.

- The second plugin I suggest is Slate Drums, which is a bit more expensive but comes in bundle with great samples.

- The third plugin in order of quality is ApTrigga, which is cheap, light, and very effective.

Drumtrig, is FREE, and very easy to use. Similiarly to Aptrigga, Drumtrig has a clean interface, but with less controls.

Boxsounds Replacer, is FREE and lets you load up to four sample layers.

KTDrum Trigger is another FREE plugin that allows you replace sounds, and this one supports up to three different frequency bands, thus is possible to replace more than one sound at the same time (anyway is suggested to open a single instance for every single drum part, to avoid errors).

Now we must choose the right samples. There are many sample packs around, and among them a very good pack is LSD DRUMS, or the Slate Drums pack, but surfing the web you can also stumble upon some good free sample library, just try searching on the Ultimate Metal and the Mixingtips forum. You can even create your own samples by microphoning a real drum or ripping the single samples from your favourite album, just make sure to find a song where the drum part is playing alone, or you will sample something of the other instruments too!

Once we have replaced all the drum parts we need (usually snare, kick and toms, since is not a good idea to replace the cybmals as the sampled ones tend to sound a bit "unnatural"), it's time to head to the "cleaning" part: clean all the midi drum tracks of the "double hits" accidentally taken by the software, correct the eventual timing and quantization errors (if the samples are replacing a real microphoned drum track), adjust the Velocity to the right levels when needed (just remember to not make it completely flat or you will lose all the dynamics of the drumming), and after this phase we will have a perfectly edited triggered drum track, which is ready to be mixed (and with the right samples, more than 50% of the mixing job is already done!).


Become fan of this blog on Facebook! Share it and contact us to collaborate!!

Friday, June 15, 2012

HOW TO DO PANNING - STEREO DISPOSITION OF THE MIX (a guide for dummies)


Hello and welcome to this week's article! Today we're going to talk about Stereo Disposition on a mix.
The moment when we usually decide the position of the single instruments in our mix's spectrum usually happens right after the Project Preparation phase, at the beginning of mixing, in the "Balancing Phase", the phase where, without using any plugin, we just try to move the volume faders up and down in order to find a good balance between the tracks, and take note of the tracks that feels "unstable": those tracks that we cannot just let sit in the mix on a single fader position, and that will require further processing in order to find their place.
It's a good idea to listen the mix in mono before starting panning (and check again at the end of the mixing phase too) in order to see if there is any Phase Cancellation, that may go unnoticed once the project is panned, but that can create problems (Click Here to read an article about Phase Analizers).

"To pan" an instrument means to set it on a position in the mix that can range anywhere from 100% left, to 100% right: if we put a track on a position that is (for example) 75% left, means that 75% of the sound will come out from the left speaker, and 25% will come from the right one, thus this sound will result closer to the listener than a 100% left sound.
We can play with the disposition in order to help every instrument to sit better in the mix, and give to the listener the feeling to be "surrounded" by the atmosphere of the song, or make him feel like he's in the middle of the rehearsal room, or even to have something that is moving from one side to another of the "soundstage". The creative uses of stereo dispositions are countless, and some of the first pioneers of stereoscopy have been Jimi Hendrix and Pink Floyd, while the first Beatles albums were originally recorded in mono.

Let's start by saying, as already stated on our Stereo Expander article (Click Here to check it out!) that Low frequencies are non-directional, while highs are very directional. As a result, pan low frequency sounds (kick drum, Bass) toward the center of a mix, and higher frequency instruments (shaker, tambourine, cymbals) further out to the left and right.

- Drumset: there are Two "schools": the "Performer Perspective" and the "Concert Perspective". I personally prefer the first one, as the second one is generally used just in certain live recordings: to set the "Performer Perspective", pan Snare and Kick to the centre, the Hi-Hat slightly to the left, the Ride to the right, and set the toms at the disposition you would find while playing the drumset. Finally, set the OverHead Microphones should be set pretty wide, often one full left and one full right. To give the "Concert Perspective", instead, just flip the left and right sides, as if someone else is playing and you're in front of the set, facing it :)

- Vocals: It's a good idea to set the lead vocals on the centre of the soundstage, and so the backing vocals, but if there is more than one backing voice you can set them one sligthly left (like 27%) and one slightly right; just remember that is a good idea to keep them balanced in the mix, unless you are not aiming to some particular effect. You can also try to pan two copies of the lead voice slightly left and right and "slip" one of them forward in the timeline of a few milliseconds: you will obtain a particular "chorus-like" effect that is sometimes heard on some commercial song.

- Guitars: the most common technique is to pan a rhythm guitar to the left (usually 60% to 95%) and one to the right (someone even pan them 100% per side), and if you feel that there's still a void around the centre, you can record a third guitar track and leave it to the centre, or copy the two guitar tracks and paste them to the centre of the spectrum (or a bit off centre, e.g. you can put the left guitar copy at 70% right, and the right guitar copy at 70% left) lowering them of 5-6 db, just to "beef up" the mix. The lead guitars are usually panned to the centre, as long as there is no voice on that part of the song, otherwise we can set them slightly aside, in order to avoid them to interfere with the vocals.
Sometimes it's better to pan 95% left and right instead of 100% because on some car stereo system guitars panned full left and right tend to sound a bit too far.

- Keyboards / Orchestrations: It's common use to pan the background pads or violins to the extremes, while treating the leads (whether they are orchestral leads/hits or synth leads) like solo instruments, so put them in the centre, or just slightly off-centre if the middle of the soundstage is too crowded; just a few points (like 5%) can make an instrument to interfere with the others.

- Addictional Awesomeness: there are some effects that lets you play with stereophony, such as the Ping Pong delay (a delay whose repetitions bounces from left to right, and that has to be loaded on a stereo track), but if you want a track, a virtual instrument or just an effect to MOVE inside of a song, you can Automate it (Click Here for an article about Automations!).


Become fan of this blog on Facebook! Share it and contact us to collaborate!!

Saturday, June 9, 2012

HOW TO USE AUTOTUNE (free VST plugins inside)


Hello and welcome to this week's article! Today we're going to talk about how to correct the pitch of vocals, or any other instrument. These pitch correction tools are usually plugins that takes a wave sound and drag it as it was a midi sample, higher or lower on the piano roll in order to match the correct note you need. 
In the last few years the technology has been developed in order to limit the inevitable degradation of a sound that is pitch shifted, especially when applied the vocal parts, which are the ones where the pitch correction is more noticed: today the pitch correction is blended with the introduction of a synth line almost inaudible right below the vocal, in order to help it to sound more "in tune". 


Obviously the pitch correction part should be seen as a "last resort", to use only if you notice, before starting the mixing phase, that there are some errors that cannot be recorded again, but that at the same time are too big to not be noticed, and that risk to ruin the song.
First off let's say that auto tuning tools works fine only with clean, monophonic sounds: any kind of background noise, or rasp vocals, or distorted sound may be misinterpreted by the algorithm and lead to mistakes. It's also suggestable to process the vocal parts without sibilant letters (s), and the guitar - bass parts where there are no slides-bendings.

There are two types of autotuning tools:

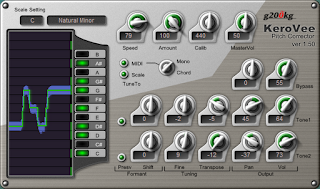
1) Automated Pitch Correctors: These are the kind of tools, such as Antares Autotune, or the free Gsnap and Kerovee, where you can choose the key of the song and other parameters, and let the plugin to automatically slide the wave on the piano roll, in order to match in real time the scale used on the song. It's a good thing not to leave it activated for the whole song, but to Automate it in order to be switched on only when needed, and turned off when unnecessary. It is also possible to create a MIDI track and route the plugin on it in order to manually decide the pitch as it was a regular synth, in facts today the industry standard is using Autotune manually, line by line, in Graphic Mode.

2) Pre - Scanning Pitch Correctors: These plugins, such as Waves Tune and Celemony Melodyne, works by pre-scanning the track and creating a "MIDI-like" version of the track itself inside their interface, so that you can use real-time autotuning (like an automated pitch corrector), or correct the pitch manually without creating an external midi track. Offline working (which means "not in real time") takes more time and efforts, but usually leads to a better result, since it leaves to you the decision of which single syllable (or even part of it) to be processed and which not. With the best Pre - Scanning pitch correctors, such as Melodyne, it's also possible to modify the single notes of a chord of an Acoustic Guitar, for example, just like a Midi file.


The famous/infamous "Cher effect" present on the song "Believe" has been obtained by forcing the vocals through wrong scales, or manually writing notes for the voice in order create that unnatural-sounding "glitch" (obviously in this case it has been an arrangement choice, but sometimes it's just a pure error).

In conclusion, regardless to the kind of plugin you may choose, autotuning should be used with extreme caution, only when impossible to record again, and only for the single parts that really needs it, since often is better to hear a more natural interpretation, although not perfectly in tune, than the "Midi-sounding" voice that sometimes can be heard, even on commercial songs. The risk is to have a completely flattened and lifeless voice, altough perfectly in tune :)

Become fan of this blog on Facebook! Share it and contact us to collaborate!!

Sunday, June 3, 2012

PROJECT PREPARATION (what to do before starting mixing)


Hello and welcome to this week's article!! Today we're going to talk about how to prepare your project before starting mixing, and how to organize your layout in order to not go completely mad with the Daw interface, making the workflow easier, faster and more CPU friendly.
We can create a single project for each song or use one project for all songs (click here for a dedicated article).
Assuming that you have imported (or Recorded) on you project all the tracks you need, these are the steps to follow:

1) Step One - Track Naming and Disposition: The best way to start is to name every track with a name that makes it easy to find even in the most clogged workflow, for example "Lead Vocals", "Rhythm Guitar Left", "Rhythm Guitar Right", and so on, then organize their disposition in groups of tracks by dragging them higher or lower in the layout, for example many studios starts with the Drum Tracks, and Colour them with the same Colour, then the Bass Tracks, and choose a different colour, then the Guitar Tracks, with another colour, then the ‘extra’ instruments (keyboards, strings…) and finally the vocal tracks. Click here for a dedicated tutorial on how to Create a Template for your DAW.

2) Step Two - Group Channel Tracks: now that we have all of the single tracks in order, we will find that we have, for example, four guitar tracks that shares the same settings, the same eq and volume, and the same effect chain, four vocal tracks, ten drum tracks and two bass tracks. Instead of effecting and applying the same settings on any single track, multiplying the Cpu load and the the waste of time, we can create Group Channel Tracks in order to apply the same settings to all the similiar tracks that we have, for example we can create a Vocal Group, a Drum Group and so on, and we can even create Sub Groups that goes into other Groups. If you Mute or Solo a Group Channel, all the tracks routed on it will be affected. If you need, you can also Link Channels, so that if you move the Volume Fader, Solo or Mute one channel, it will affect all the linked ones. Click here for a dedicated tutorial on how to use Group Channel Tracks and How to Link Channels. 

3) Step Three - Editing: Now it's time to cut every background noise in between of the played parts in the audio tracks of our project, since noise it's useless and harmful, especially in projects with many tracks: the noise present on every track will sum up, to the point that it will be really tedious. Once we have got rid of the noise, it's time to do some Time Editing: we can improve the timing of anything, from drums, to vocals, to the single guitar strums, by cutting the track at the Zero Point, which is the 0db area before the start of a sound, and moving the area forward or backward in order to match the other instruments (usually the drums). If you select the "Snap to Grid" button, the cursor will snap the selected sound to the MIDI grid, which can be divided in 1/8, 1/16, 1/32 and so on, in order to be more precise for the positioning. If you feel that for example the vocals on the first chorus are way better than the ones of the second chorus, you can copy and paste the first chorus vocals on the second too, in order to improve what cannot be recorded again. For more info, check out the dedicated article about Editing!

4) Step four - Pitch Shifting / Autotuning: Once everything is perfectly organized and routed, and all the audio tracks are finely edited and in timed one another, it's time to check out the tuning, especially of the Vocals, but also for example for Bass or Guitars (although tuning software works well almost exclusively with Clean or Acoustic Guitars). For more info, Click Here to read the dedicated Article about Autotuning!

Once you have found the layout best fitting your needs, you can also Save it as a Template, so that your next projects will be even faster and smoother!

Become fan of this blog on Facebook! Share it and contact us to collaborate!!